My Top Tips for Taking Great Photos With Your iPhone
AS SEEN ON THE HOUSE FUR BLOG AND CBS58 News.
I always say the best camera is the one you have on you! The majority of my friends and family do not own professional-grade camera equipment, but they do own a cell phone. Here are my My Top Tips for Taking Great Photos With Your iPhone that you can apply and capture those everyday moments happening in-between your next family photo session with Studio 29.
Thank you Michael Schlesinger from CBS News: Local Photographer Taking Photos of You & Raising Money for the Community During the COVID Crisis

I hope these simple tips help you use your iPhone camera to its fullest potential! For more photography tips visit my lifestyle blog: House Fur.
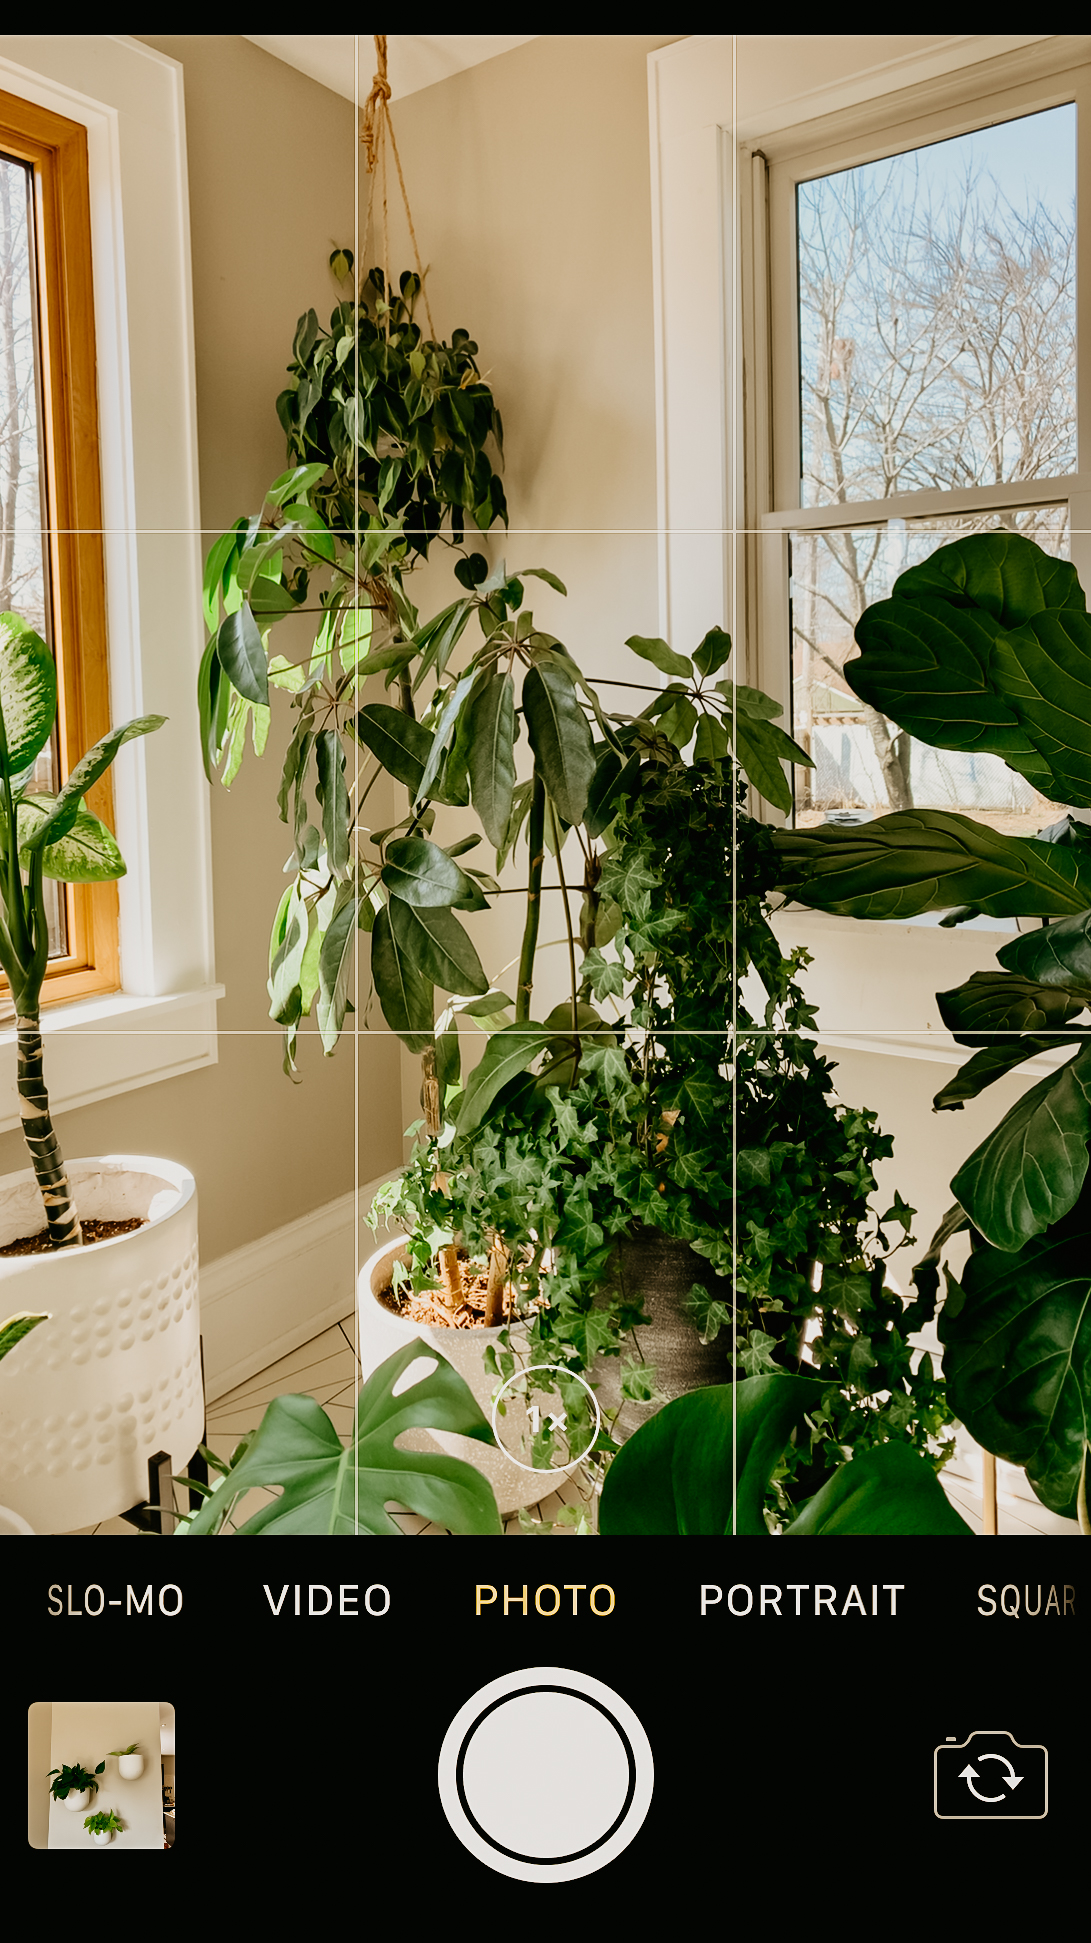
Turn On Your iPhone Grid
Your iPhone grid will break down your photo screen into nine parts.
I love this function because it helps me keep my images level. Crooked pictures drive me batty.
The grid function will also help you achieve great composition. If you place your subject or points of interest at intersections of the grid, the photo will follow the “Rule of Thirds” and be more pleasing to the eye.
Don’t feel pressured to go crazy with the rule of thirds – remember rules are meant to be broken! You can always crop an image after it has been taken.


Try Some Simple Editing Techniques
I love to play with the elements of my images to enhance not transform them into an unrecognizable state. Less is sometimes more!
Tweaking the sharpness, saturation, and brightness of an image can make an amateur shot appear professional.
Two apps I recommend are Snapseed and VSCO Cam.

Move Forward or Backward Rather Than Zoom
I don’t particularly care for the “Zoom” function on the iPhone because I find that it degrades the quality of the image, making it blurry or distorted. I prefer to step a few feet backward or forward and tilt the camera up or down to get the image I want, and then, as I said before, you can always crop the image afterward.
Don’t Miss The Shot!
Swipe up on the iPhone camera shortcut from the Lock screen, however, and you can quickly take that picture with no significant wait time. You can also do something similar while in an app or on your Home screen by swiping up from the bottom of the screen to launch Control Center, then tap on the Camera Icon Button.

Turn Off the Flash
Newer generations of the iPhone have a “better” flash than in the past, but at the end of the day, the flash is still just a crummy LED light.
You’ll get amazing results if you take photos with natural evenly lit situations.
Play With The Exposure
When you open your camera on your iPhone tap the screen on the lightest part of the image to activate the exposure function. The iPhone will automatically expose for whichever part of the image you tap on, and then you can use your finger to toggle the brightness or darkness.


Join Me On Instagram: @studio29photography & @house_fur
Join Me On Twitter: @ren-lenhof
Leave a Reply
You must be logged in to post a comment.
Be the first to comment